


Overcoming doubts and fears
People who have never gone on a long, untethered wilderness trip will have lots of things going through their minds while planning the trip. This can lead to becoming overly cautious and might lead you to bring lots of gear with you that you don’t actually need. Outdoor resellers will try to make money with your fears. They will try to sell you the heaviest duty and most expensive gear. Nature will surely devour you, if you don’t have that super heavy duty gear for your trip. Most of the heavy gear is overbuilt and simply not needed, even for off trail routes. On these types of hikes less is usually more and knowing where to go light and where to invest your weight is a thing every person must learn for themselves. Carrying a light pack will make your stay in nature so much more enjoyable.
But where do we start? Before we know what to take with us, we need to know exactly what kind of terrain and weather conditions we will encounter during our trip. It always starts with…
Creating the route
Usually the first thing to decide is where we want to explore. Since we’ll be using a GPS device for any backcountry adventure like this, it will start with creating a route. There are many different systems to use. We have been using Garmin devices for a long time, which is why we will be sticking with it as an example. The different GPS systems all work more or less the same way.
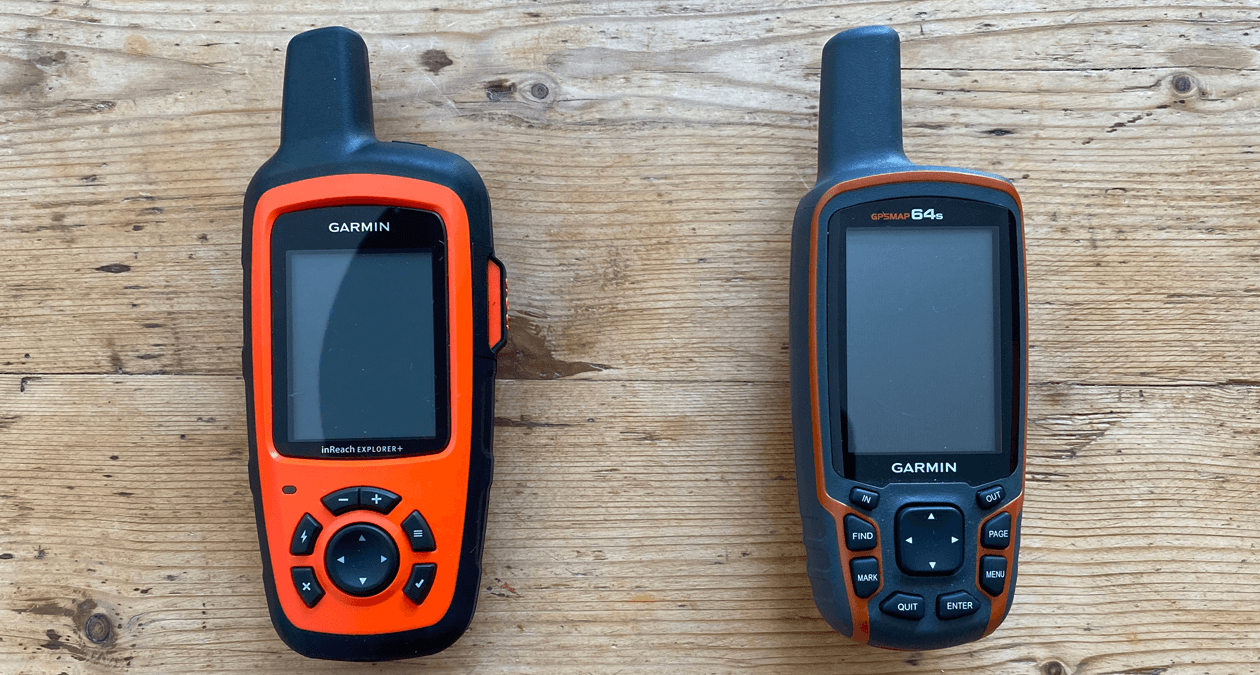
For our Sarek trip, we chose to use the Garmin inReach Explorer + because of its live tracking function, so that friends & family will be able to track us and see what we are up to. It can also serve as an emergency signaling device in case someone needs to be rescued and you can pair it with your phone to send SMS to loved ones via GPS – Pretty cool huh?
Hope for the best, plan for the worst.
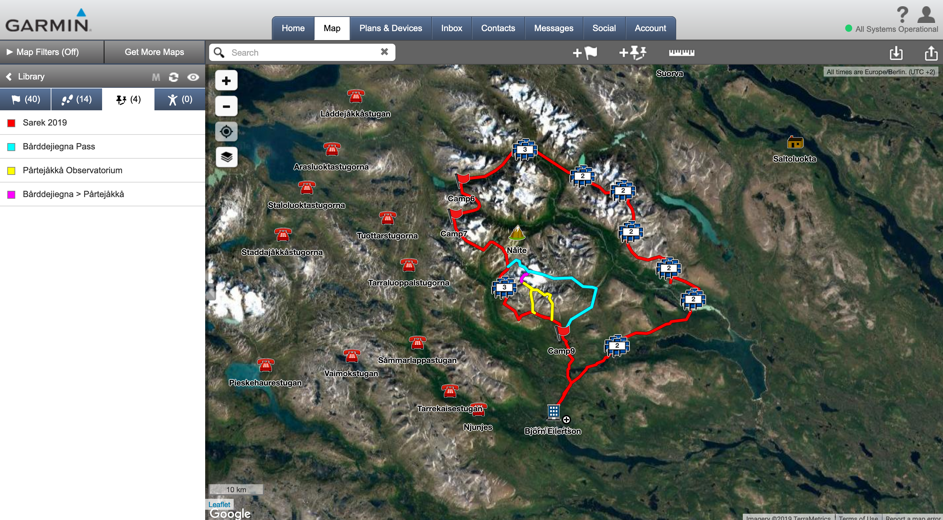
When creating routes for hiking in a specific area, I have made it a habit to create many side routes, shortcuts and detours to choose from. You never know what will happen and having planned different routes will give you a better understanding of the area and it’s also good practice. It’s a good thing to have more than one exit strategy. In Sarek there is only one emergency shelter with a radio phone in the center of the park.
There are two major trails right outside Sarek’s borders: Kungsleden and Padjelantaleden are both well maintained and have some infrastructure in terms of STF cabins and emergency shelters. STF stands for Svenska Turistförenigen and is the Swedish Tourist Association. If you plan to hike in Sweden a lot you might want to consider getting a membership. With it, you’ll be able to use all the facilities at the mountain cabins and you can stay there free of charge between 9:00 and 17:00. You’ll also get a discount on rooms, if you plan to stay the night to dry out gear. Most cabins have a well geared kitchen with gas burners and even cookware, which you can use. Lots of cabins also have a small shop and if located near Sami settlements you can also buy smoked fish or dried reindeer meat. Some of the cabins also have an emergency phone and a helicopter landing pad in case you want to fly in or out. Helicopter transports are arranged by ‘Fiskflyg’. Transports cost 1450SEK (Swedish Crowns) which equals about 140€, including 20kg of baggage. You can check the timetables on fiskflyg.se. They will also do custom drop-offs but are not allowed to fly into Sarek. Only in emergency situations are helicopters allowed to fly here.
It’s a good idea to create waypoints to all the emergency shelters and phones around the area you are hiking in. When planning a route, I don’t only plan for myself but also take into account that I might come across a person in need of help. With modern GPS devices there are ways of sharing data wirelessly between two devices. If I meet another person, I might be able to help by sharing my data. It’s fun to plan routes using satellite images and topological maps and then see how the route plays out when you’re actually in the terrain. The more you do this, the more you will learn how to interpret satellite images and you’ll get better at it with every trip you plan. I have also made it a habit of marking good campsites. This will enable me to know how far away the next campsite is in case I need to get out of the rain on my next trip. River crossings are also a good thing to tag once you’ve found a good spot to cross. There are many tutorials online about how to create routes and navigate them using the GPS system of your choice.
As soon as you’ve decided where you want to hike and have planned a route using topological maps as well as satellite images you will have a rough idea of what you are getting yourself into. You can analyze weather patterns of the previous years in the area to get an idea about how cold it gets at night and what temperatures and weather conditions you may encounter in general.
This will help a lot in deciding what kind of clothing, shelter and sleep system to take with you. What kind of backpack to use will be decided at the very end, when you actually know exactly what you are going to be packing.
Shaving weight
The first step in putting together an lightweight kit is to start documenting the equipment and the weights of what you currently own. Putting my gear list in Excel or some other gear calculator like ‘GramWeenie’ is the only way I’ve been able to see where the bulk of the weight in my pack is coming from. This helps me make decisions early in the trip planning process.
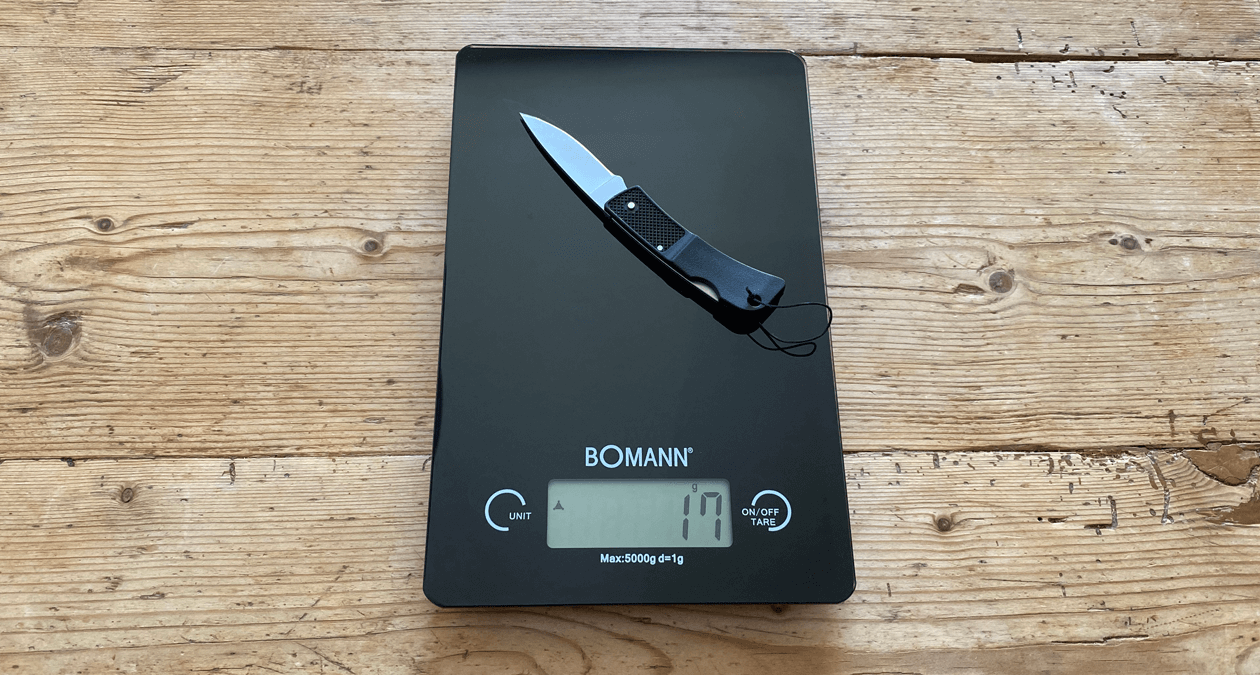
I recommend purchasing a small digital scale like the ones you use in the kitchen. Once you have the scale, make a list of all your equipment and add up the weights. If you own multiple tents or backpacks, break the list into categories like shelters, sleep system, cooking, hydration, clothing, etc.
Once you have a running list of items and their weights, pretend you’re going on a trip and highlight the pieces you think you’d need or like to take. Look at the total weight of the kit, and you’ll be surprised by how quickly it adds up. If you’re unsatisfied with the result and want to start shedding mass, pay attention to the heaviest items on the list and either swap them out for lighter products you already own, or look to replace them.
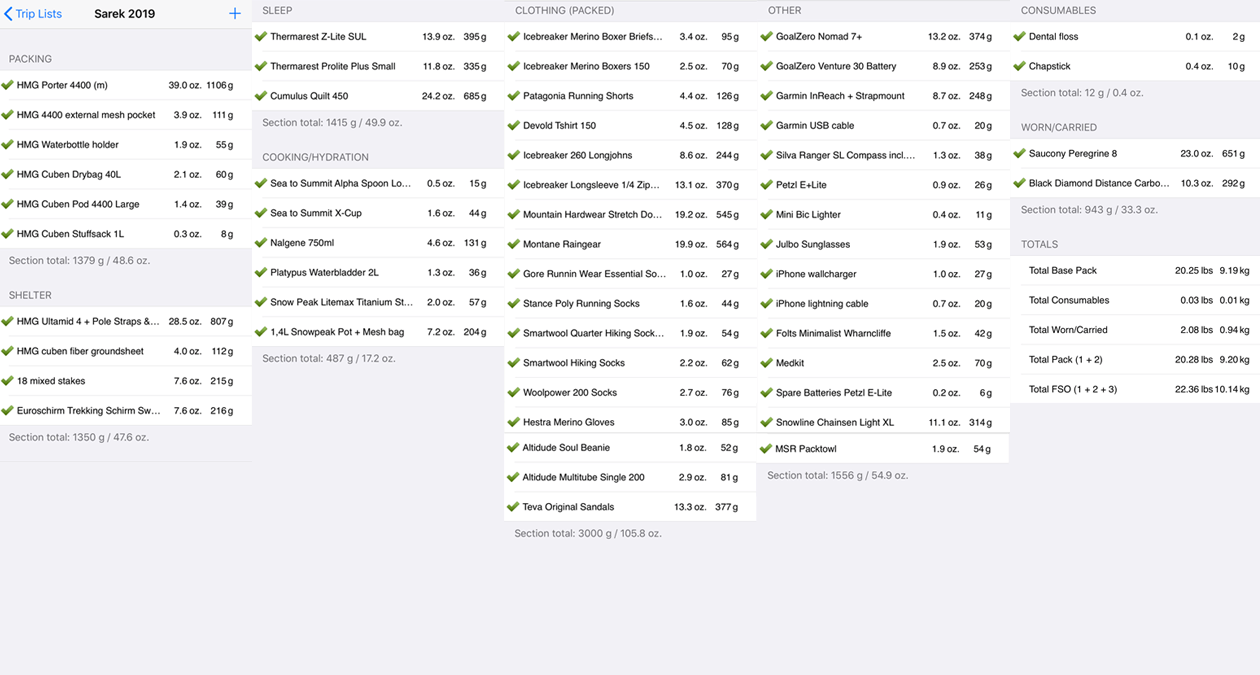
The gearlist above also contains shared items which were distributed among our packs for the Sarek 2019 tour. Sharing items is the best way of reducing bulk weight. If you don't mind sharing a sleeping bag or quilt you could also buy a larger one to accommodate two people. ♥ By sharing a sleeping bag you can go with a lighter one as you will be generating more heat within the bag as you would if sleeping alone. If you are used to different sleeping temperatures the warmer sleeper could add an extra liner for more warmth.
This process should be ongoing, and you certainly don’t need to upgrade or purchase new items all at once. Reflecting on the successes and failures of your endeavors and continual experimentation is what will eventually lead to the creation of a kit that works perfectly for you.
It’s taken years for me to dial in my current 5-6 kg base weight kit (base weight = all carried equipment minus consumables – food, fuel, water) for the trips I do now. You might be able to go lighter. For example, I choose to hike solo with a 4-person tent, simply because I like to have space when I’m stuck in bad weather for longer periods.
No matter if I’ll be in the desert or in alpine terrain, this ‘core kit’ always includes my pack, shelter, sleeping pad, hydration system, cooking system, rain gear, headlamp, and a few other tried and true items. The only thing that really changes for me is the temperature rating of my sleeping bag, type of shelter, my insulating clothing, and if I’ll need any terrain specific items like ice axes, crampons, length of rope, harness, or extra water carrying capacity.


